

Rocky Horror
![]()
I have been wanting to do some faux stone wall panels for some time and have not found a satisfactory method ... until now. Other methods I have attempted turned out to be too slow, too costly or yielded unsatisfactory results, or a combination of these.
This method is extremely easy to do if you have the tools, but it does take a little bit of practice (although if you have developed "a feel" for airbrushing, you will take to this like a newborn "pure-blood" takes to fresh meat).
This technique as far as I know, is original, as I have not seen nor heard of anyone else doing it this way, but if anyone has run across it drop me a line please, as I would like to check it out.
The main difference between this and other methods is the use of a sandblaster. While not a real common tool in most home workshops, they are relatively inexpensive and very versatile. The model that I used to create the following test panel is a small unit from Harbor Fright, which uses a pressurized media tank ... retails for like $80. One word of caution; sandblasting takes ALOT of air to run constantly. Smaller compressors (under 5hp) will take some "catching-up time."
I'm not going spew about how to use a sandblaster or all the safety crap that goes along with it and I don't have MSDS's for any of this ... so if you choose to try this method, you are on your own!
Okay, okay on with it
TOOLS / MATERIALS REQUIRED:
Air compressor (the larger the better)
Sandblaster and sand
Propane (or Butane) Torch
Foam board (thickness of your choice, I used 1 inch)
Paint, Gray and Black (like that's something new to haunters)
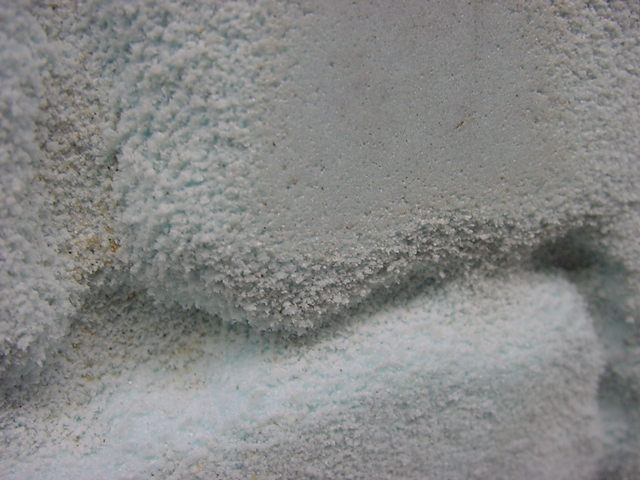
The following picture is a close-up of the texture that is achieved on the blue Dow foamboard. Obviously, the sandblaster is used to form the indentations which are the mortar joints between the stones. Additionally, I textured the stones themselves adding fissures and such to make them more convincingly realistic looking.
The sandblasting process is VERY fast, as the soft foam is no match for the intense pressurized stream of abrasive. You have to move in quite fast and deliberate strokes (similar to airbrushing). For the mortar grooves, the tip is quite close to the surface ... about 1 1/2" I would guess. For the stone texturing, I backed away from the surface to about 6 to 8 inches.
I intentionally left a spot which was untouched right below here.
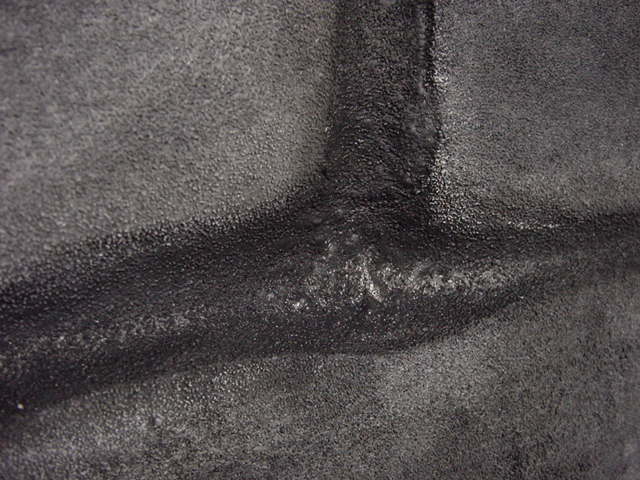
Next, I took out the propane torch (I don't love mine as much as Keeba loves hers, but I do like it :-) Passing over the mortar joints VERY quickly adds some neat texturing, and creates a contrasting texture which is different from the stones. Again, this is done VERY fast, as the intense heat melts the exposed edges very quickly. I found it easy to over-do this step.
Again, the untouched spot on the surface can be seen right under here.
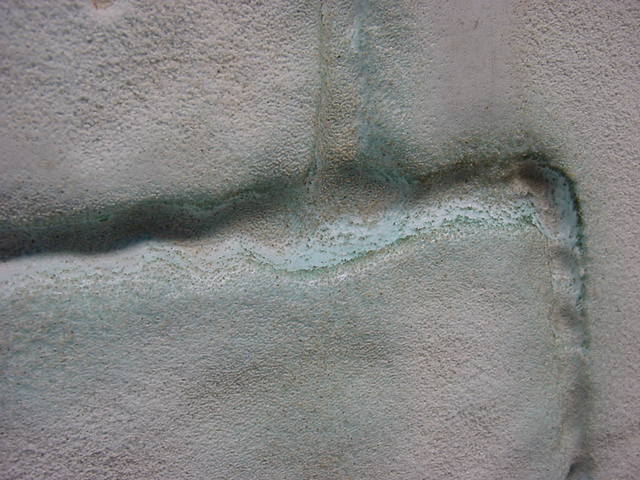
An extreme close-up of the finished mortar joint after painting can be seen here. To paint, I took the Wagner airless sprayer and "hosed down" a coat of very thinned out gray. While not entirely dry, I brushed on some darker gray and black on the stone areas. After dry, I airbrushed (and brushed) black in the mortar joints.
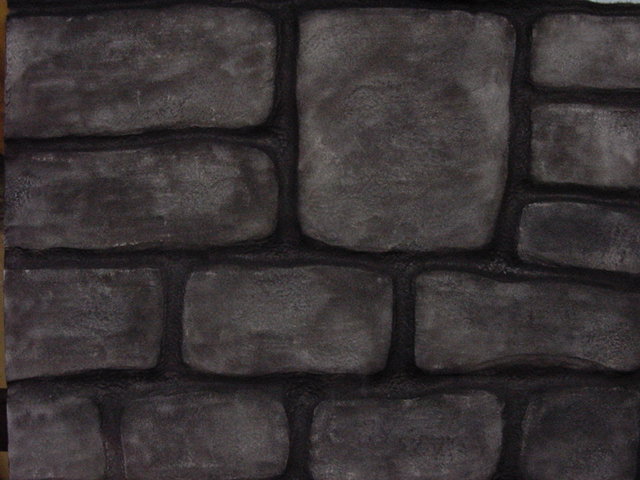
The finished test panel.
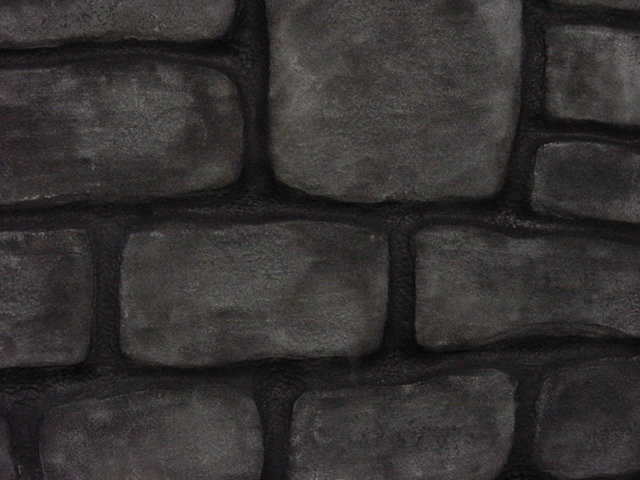
Another shot of the test panel about 1 foot farther away than the above shot ... LOL.
What I really like about the results of this method is that it looks just as good or better the closer you get to it. And best of all ... it's easy, cheap and FAST. I am guessing that I can make a 4 foot by 8 foot panel in less than 30 minutes (not counting paint drying time). That works for me.
This is just a sneak preview of a test panel. More finished stuff to come (if I can remember to keep the camera close).
Have fun, and enjoy. Haunt on!!
-Thirsty-